一.需求提出
公司刚刚申请了一台服务器,需要部署 nginx 环境。
二.环境情况
系统是 Centos 的,需要离线安装。
# 查看自己的版本
cat /etc/os-release
[root@localhost ~]# cat /etc/os-release
NAME="CentOS Linux"
VERSION="7 (Core)"
ID="centos"
ID_LIKE="rhel fedora"
VERSION_ID="7"
PRETTY_NAME="CentOS Linux 7 (Core)"
ANSI_COLOR="0;31"
CPE_NAME="cpe:/o:centos:centos:7"
HOME_URL="https://www.centos.org/"
BUG_REPORT_URL="https://bugs.centos.org/"

CENTOS_MANTISBT_PROJECT="CentOS-7"
CENTOS_MANTISBT_PROJECT_VERSION="7"
REDHAT_SUPPORT_PRODUCT="centos"
REDHAT_SUPPORT_PRODUCT_VERSION="7"
三.离线安装前置依赖环境
安装 gcc、perl 以及相关的依赖 openssl、pcre2、zlib。
3.1 gcc安装
请确保已安装 gcc,查看 gcc 版本信息:
gcc -v
如果终端打印 gcc 相关版本信息,说明已安装 gcc,否则请安装 gcc:
[root@localhost ~]# gcc -v
Using built-in specs.
COLLECT_GCC=gcc
COLLECT_LTO_WRAPPER=/usr/libexec/gcc/x86_64-redhat-linux/4.8.5/lto-wrapper
Target: x86_64-redhat-linux
Configured with: ../configure --prefix=/usr --mandir=/usr/share/man --infodir=/usr/share/info --with-bugurl=http://bugzilla.redhat.com/bugzilla --enable-bootstrap --enable-shared --enable-threads=posix --enable-checking=release --with-system-zlib --enable-__cxa_atexit --disable-libunwind-exceptions --enable-gnu-unique-object --enable-linker-build-id --with-linker-hash-style=gnu --enable-languages=c,c++,objc,obj-c++,java,fortran,ada,go,lto --enable-plugin --enable-initfini-array --disable-libgcj --with-isl=/builddir/build/BUILD/gcc-4.8.5-20150702/obj-x86_64-redhat-linux/isl-install --with-cloog=/builddir/build/BUILD/gcc-4.8.5-20150702/obj-x86_64-redhat-linux/cloog-install --enable-gnu-indirect-function --with-tune=generic --with-arch_32=x86-64 --build=x86_64-redhat-linux
Thread model: posix
gcc version 4.8.5 20150623 (Red Hat 4.8.5-44) (GCC)
安装 gcc 涉及到的所有依赖统一放到 /opt/rpms/gcc/ 目录下,为了避免其它无关依赖导致 gcc 安装失败,请确保 /opt/rpms/gcc/ 是一个空目录。
下载 gcc 依赖以及相关依赖:CentOS Mirror
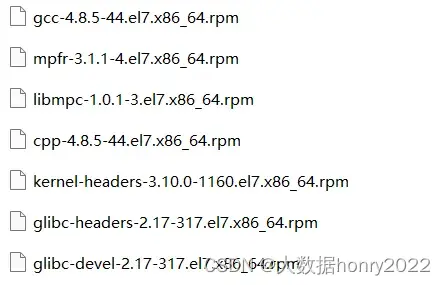
具体需要什么依赖,需要根据自己使用的 Centos 版本在镜像中进行下载,在安装时需要根据系统提示,需要什么依赖以及哪个版本的依赖就从镜像中下载哪个依赖(如图为 Centos7.9 需要用到的依赖):
将上述所有依赖上传至 /opt/rpms/gcc/ 目录中,并执行以下命令:
yum -y install /opt/rpms/gcc/*.rpm
安装 gcc 也可以参考此文:《RedHat裸机离线安装gcc-4.8.5》
3.2 perl安装
请确保已经安装 perl 环境,查看 perl 版本:
perl -v
如果终端打印 perl 相关版本信息,说明已安装 perl:
[root@localhost ~]# perl -v

This is perl 5, version 40, subversion 0 (v5.40.0) built for x86_64-linux

Copyright 1987-2024, Larry Wall

Perl may be copied only under the terms of either the Artistic License or the
GNU General Public License, which may be found in the Perl 5 source kit.

Complete documentation for Perl, including FAQ lists, should be found on
this system using "man perl" or "perldoc perl".  If you have access to the
Internet, point your browser at https://www.perl.org/, the Perl Home Page.
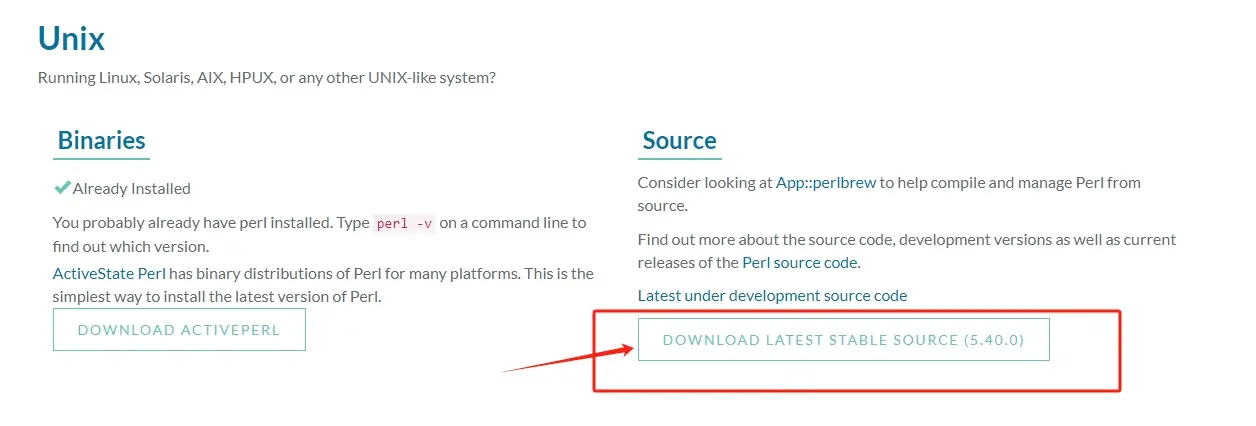
否则,请安装 perl,下载地址:Perl Download - www.perl.org
将其上传至 /opt/sources 目录中,并执行以下命令:
tar -zxvf /opt/sources/perl-5.40.0.tar.gz -C /opt
cd /opt/perl-5.40.0
./Configure -des
make && make install
3.3 其他相关依赖
下载 openssl、pcre2 以及 zlib 源代码文件,并将这些文件上传至 /opt/sources 目录中。
1.openssl 下载地址:[ Downloads ] - /source/index.html
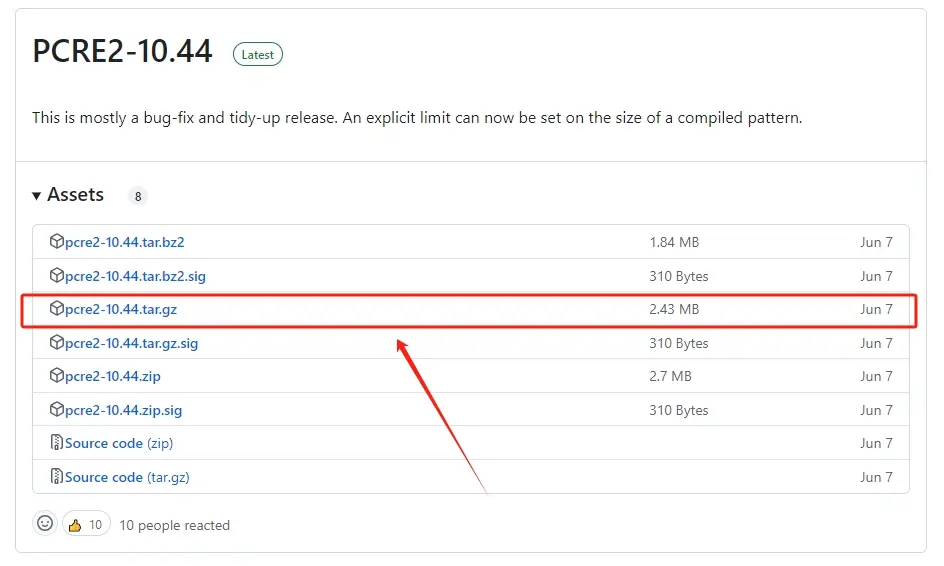
2.pcre2 下载地址:Releases · PCRE2Project/pcre2 · GitHub
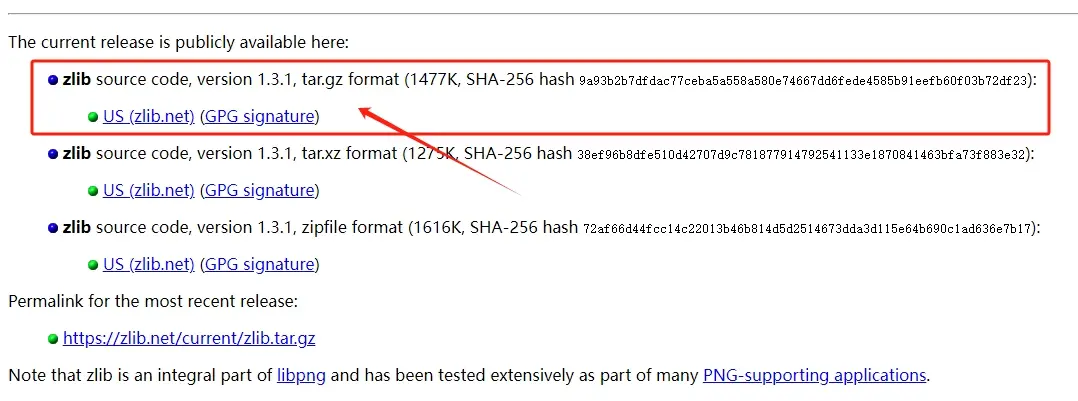
3.zlib 下载地址:zlib Home Site。注意 zlib 版本需要 1.1.3+
解压 openssl、pcre2 以及 zlib:
tar -zxvf /opt/sources/openssl-3.3.2.tar.gz -C /opt
tar -zxvf /opt/sources/pcre2-10.44.tar.gz -C /opt
tar -zxvf /opt/sources/zlib-1.3.1.tar.gz -C /opt
四.正式安装nginx
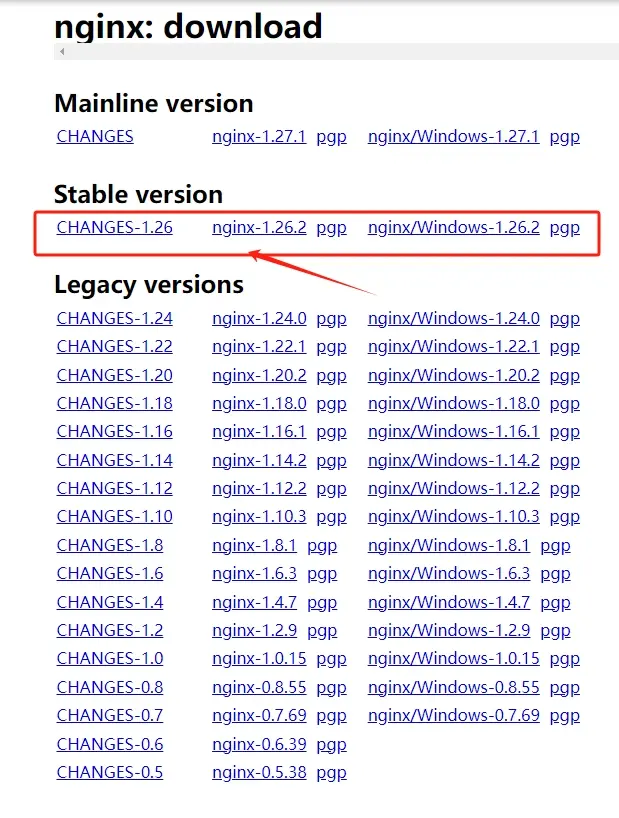
4.1 nginx下载
下载地址:nginx: download
4.2 解压nginx的tar.gz包并编译
将上述压缩包上传至 /opt/sources/ 目录中,执行以下命令:
tar -zxvf /opt/sources/nginx-1.26.2.tar.gz -C /opt
cd /opt/nginx-1.26.2

# prefix:指定安装目录,为了方便使用,这里选择/usr
# with-pcre:pcre2的根目录(上述解压的pcre2-10.44.tar.gz)
# with-openssl:openssl的根目录(上述解压的openssl-3.3.2.tar.gz)
# with-zlib:zlib的根目录(上述解压的zlib-1.3.1.tar.gz)

./configure --with-http_ssl_module --prefix=/usr --with-pcre=/opt/pcre2-10.44 --with-openssl=/opt/openssl-3.3.2 --with-zlib=/opt/zlib-1.3.1
make && make install
4.3 启动nginx
# 默认配置文件启动
nginx
# 指定配置文件启动
nginx -c /opt/nginx-1.26.2/conf/nginx.conf
4.4 查看nginx进程
[root@localhost ~]# ps -ef | grep nginx
root      7323 16784  0 10:07 pts/0    00:00:00 grep --color=auto nginx
root      7501     1  0 Sep19 ?        00:00:00 nginx: master process nginx -c /opt/nginx-1.26.2/conf/nginx.conf
nobody   16841  7501  0 Sep19 ?        00:00:00 nginx: worker process
[root@localhost ~]#
4.5 停止nginx
# 立即停止
nginx -s stop
# 完成当前工作后停止
nginx -s quit
4.6 使用更改后的配置文件重新启动nginx
nginx -s reload
# 指定配置文件
nginx -s reload -c /opt/nginx-1.26.2/conf/nginx.conf
4.7 检查nginx配置文件是否正确
nginx -t
# 指定配置文件
nginx -t -c /opt/nginx-1.26.2/conf/nginx.conf
4.8 访问 nginx 主页
http://[ip]:80
注意:访问 nginx 主页时,请关闭防火墙,或者开放 80 端口
五.卸载nginx
5.1 停止nginx
nginx -s quit
5.2 删除nginx根目录
rm -rf /opt/nginx-1.26.2
5.3 查看其余的nginx相关文件
find / -name nginx
删除上述命令中查找到的文件。
六.配置nginx开机自启动(使用 systemd)
6.1 创建 systemd 服务文件
sudo vim /etc/systemd/system/nginx.service
6.2 写入以下内容
[Unit]
Description=The NGINX HTTP and reverse proxy server
After=network.target remote-fs.target nss-lookup.target

[Service]
Type=forking
PIDFile=/usr/logs/nginx.pid
ExecStartPre=/usr/sbin/nginx -t -c /opt/nginx-1.26.2/conf/nginx.conf
ExecStart=/usr/sbin/nginx -c /opt/nginx-1.26.2/conf/nginx.conf
ExecReload=/bin/kill -s HUP $MAINPID
ExecStop=/bin/kill -s QUIT $MAINPID
PrivateTmp=true
Restart=on-failure
RestartSec=5

[Install]
WantedBy=multi-user.target
6.3 重载 systemd 配置
sudo systemctl daemon-reload
6.4 启用开机自启 + 立即启动服务
# 设置开机自启
sudo systemctl enable nginx

# 立即启动 Nginx
sudo systemctl start nginx

# 检查状态
sudo systemctl status nginx
6.5 验证是否生效
6.5.1 检查服务状态
systemctl is-active nginx    # 应返回 "active"
systemctl is-enabled nginx   # 应返回 "enabled"
6.5.2 重启系统测试
sudo reboot
# 重启后执行
curl http://localhost
# 应能返回 Nginx 欢迎页或你的站点内容




评论